
Wondering how to install a shower filter properly? In this guide, we’ll show you how to install it right.
While you might think that replacing your old showerhead is the solution to this problem, it’s not really true. You can protect yourself from hard water and water impurities by ensuring that the water in your shower is clean and doesn’t contain any contaminants or harmful minerals.
So, how do you do that?
By installing a shower filter. Yes, you can purchase shower filters in order to get pure and filtered water for bathing. These filters are effective in reducing or removing the contaminants, chlorine and other elements that are usually present in the water. Best of all, they are easy to install.
In this article, we will tell you the different types of filters that are available in the market and how you can install them in your shower.
What Are The Types of Shower Filters
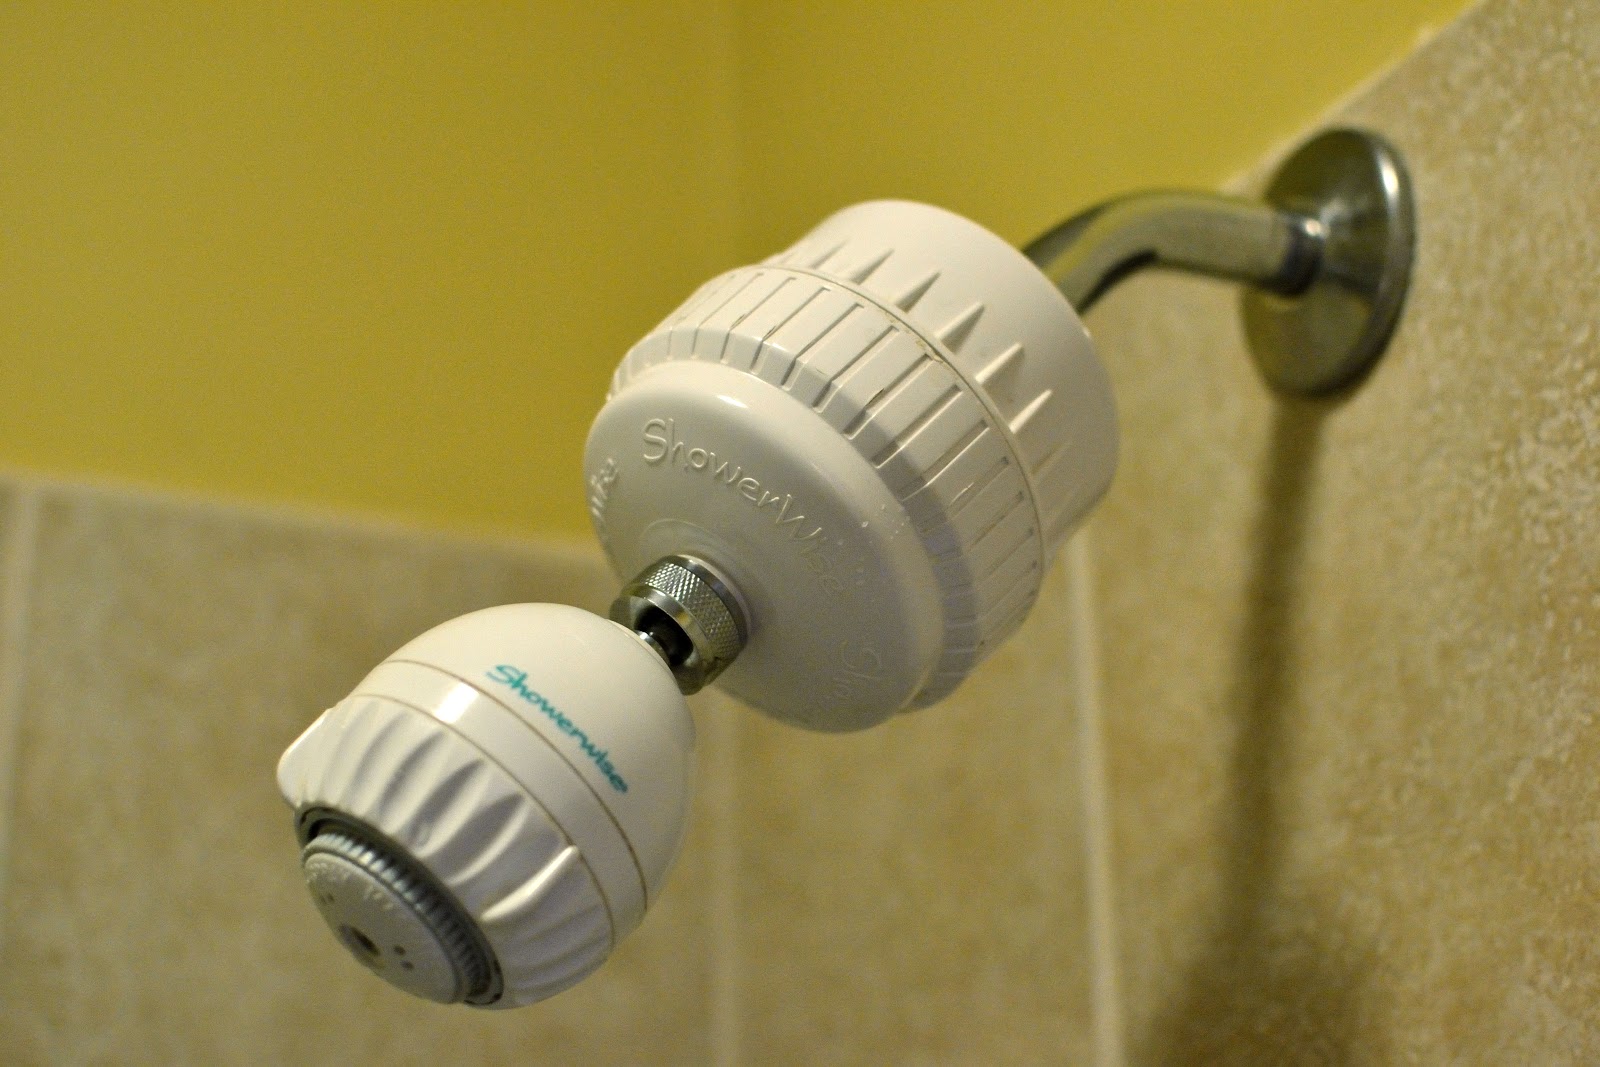
Now, before you install a shower head filter, it is important that you know about the different types of filters in order to get a filter which will be an ideal match for your shower head and needs. There are mainly 3 types of water filters that can be installed in your shower:
Carbon Filters
A simple carbon filter can remove the chlorine content from the water but is not effective at removing chloramines and does not work well in hot water.
So, if you use cold showers more than hot showers and want a cheap filter to install in your shower, then a carbon filter is the perfect choice for you.
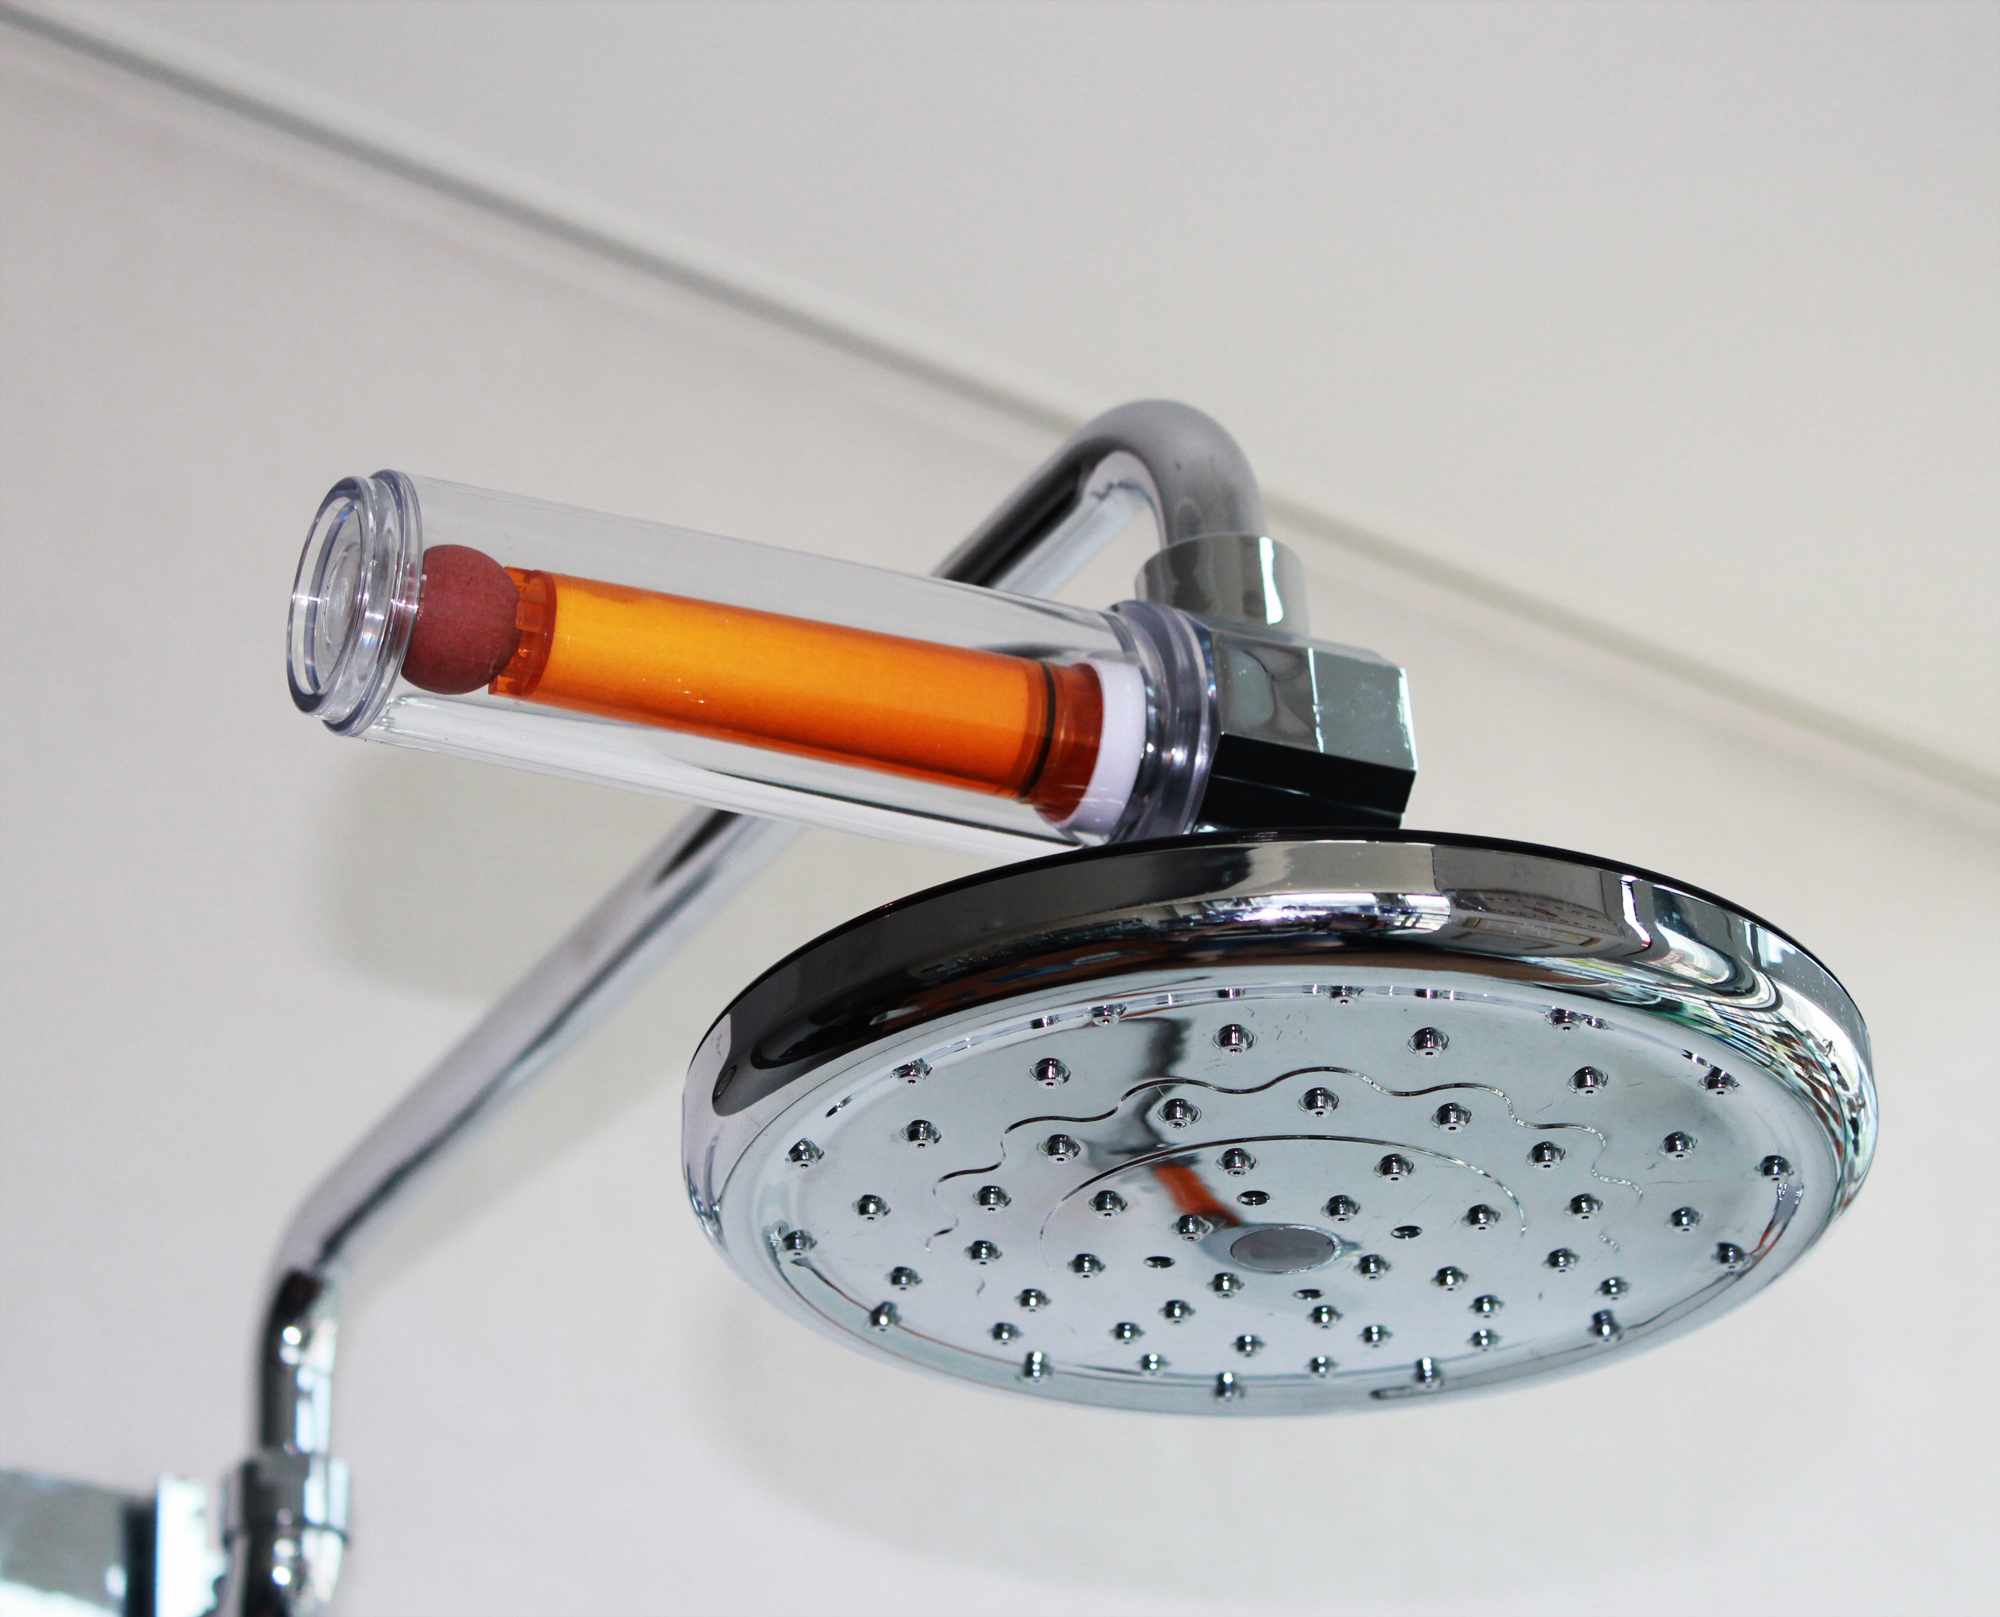
Vitamin C Filters
This is the most effective water filter which can not only get rid of the chlorine content but can also remove chloramines by creating a chemical reaction which leaves both these elements useless.
This type of filter is beneficial for your skin and can help in improving your skin and hair conditions after a few showers.
KDF Filters
This is another inexpensive option for removing the chlorine from water but even this filter is ineffective in front of chloramines so make sure you use this only if your area doesn’t face the chloramine issue.
How to Install a Shower Head Filter
Are you interested in installing a shower head water filter yourself?
If yes, then you just need to gather a few essential tools and then you are all set to install your water filter in the shower.
Make sure you purchase the right filter type before you start installing it and assess your water before you make any decision. Also, be sure you have a filter cartridge on hand for the installation. Your shower filter likely came with instructions and parts needed, so please read those instructions as well.
Things You Will Need:
- Pliers or adjustable wrench
- Teflon Tape
- Filter
Just follow the below steps to install your showerhead filter in just a few minutes time:
Step 1: Detach The Showerhead
The first step requires you to first remove the showerhead from the shower arm with the help of a pair of pliers. Keep in mind, needle-nose pliers generally won’t work well here because you won’t get enough grip. But slip joint pliers or an adjustable wrench will work nicely.
Depending on your shower head type, you might need to use a different tool to unfasten the nuts of your shower head. So, review your manufacturer’s manual for the nuts size in order to determine the nuts used for securing the shower head to the shower arm.
Step 2: Seal the Shower Pipe
Now, wrap the plumber’s tape all around the male threads of the shower pipe and make sure that the tape is properly placed so that there is no water leakage from the filter once it is attached to the shower pipe.
Generally speaking, when applying plumber’s tape, wrap around the threads 2-5 times. This should provide enough of a seal when the shower filter is installed to keep shower water from leaking out.
Step 3: Place the Shower Filter
Now, gently place your shower filter on the pipe that is covered with plumber’s tape and then use your hands to rotate the filter in a clockwise direction to tighten.
This will help in securing the filter to the pipe. If the filter comes with nuts, then turn the nuts in ¼ direction using the pliers.
Step 4: Turn on the Water
Now, place a bucket beneath your filter and then turn on the cold water. Let the water flush through the filter and you will find the water discolored due to carbon deposits.
This is normal so make sure you let the water run until all the discolored water is removed and normal water starts pouring out of the filter head again.
Step 5: Flush until Water turns clean
Slowly turn on the hot water too and flush your filter until the water starts running clean. Then, you need to turn off the water and remove the bucket from beneath the filter head.
Step 6: Re-attach the Showerhead
Finally, attach your shower head on top of the shower filter and use your hands to turn the shower head until it is properly fixed.
Now, your shower filter is all ready to be used and will only pour out clean water! This will improve your water quality and feel much better on your skin.
Need Help? Shower Head Filter Installation Tutorial