Have you recently bought an RO System for your home? Wondering if you can install it yourself? Here’s how it can be easily done.
Installing your own Reverse Osmosis water filtration system is easy and helps in saving both money and time. If you have previously installed other items at your home then this should be a piece of cake for you.
Purchasing the RO system yourself will not only make you more confident about your water filtration system but will be easier on your pocket too and with the numerous installation videos on the YouTube, you have a lot of material options to refer to.
In this article, we will highlight the use of an RO system and how it can be beneficial to the users along with the installation steps so that you can get your own water filtration system up and running in no time at all.
What is a Reverse Osmosis (RO) System?
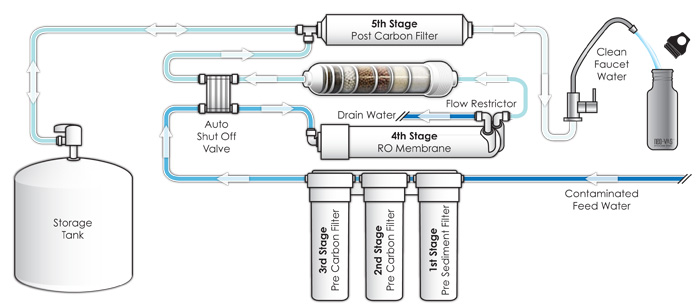
A Reverse Osmosis (RO) System is a kind of water filtration system which helps in removing a lot of water contaminants by applying pressure on the water by passing it through a semi-permeable membrane.
Basically, this water filtration takes your supply water and then makes it go through reverse osmosis in order to get rid of the minerals, ions, and other contaminants that are available in the water to give you a clean and pure drinking water. It also helps in improving the taste of the water and ensures that you don’t get sick due to contaminated water.
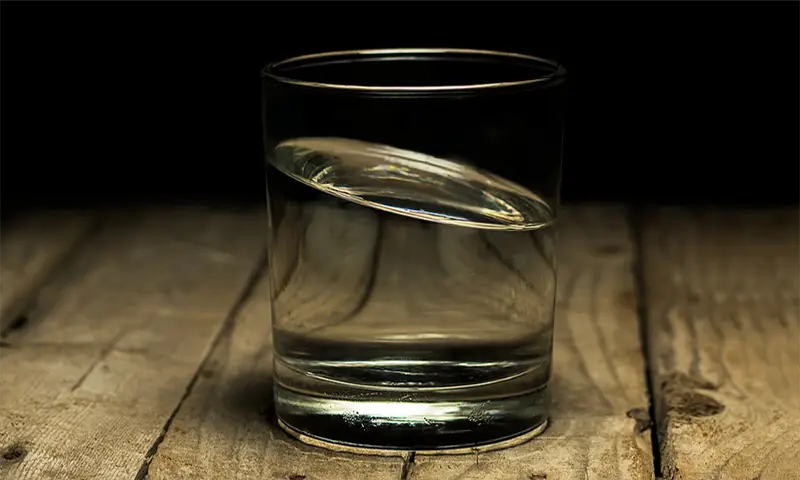
Drinking clean and fresh water is essential in order to stay fit and healthy and an RO water filtration helps you in achieving just that.
Do you need a Reverse Osmosis System?
Now, you might think there are several other water filtration systems available in the market so why you should choose the Reverse Osmosis system?
Well, because apart from removing the contaminants, there are other benefits of using an RO water filtration at home:
Removal of Contaminants
One of the most obvious benefits of using the Reverse Osmosis water filtration system is that it helps in reducing the unwanted contaminants which can be harmful to your health.
This includes contaminants like arsenic, radium, fluoride, copper, barium, and so on. RO water systems can help you in getting pure drinking water for daily use.
Reduction of Sodium content
A lot of people use water softeners at home to remove the hard minerals from the water and while this water is good for bathing and cleaning, it is not ideal for drinking and can taste quite funny too.
This is because water softeners add sodium content to the water which can alter the taste of the water but reverse osmosis system can remove the sodium content from your drinking water and makes it pure and free of any minerals as well. So, you get a pleasant tasting soft water to drink.
Reduction of Purchase of Bottled Water
We often buy bottled water because we don’t like the taste of our tap water but bottled water is expensive and create a lot of plastic waste which is not good for our environment.
Bottled water is not entirely pure and is only filtered water so there still might be harmful substances in it which could make you sick.
An RO system makes it easy, convenient and cheap for you to get clean drinking water from your tap and will cost you just a few pennies in the long term.
Good Water Taste
One of the best benefits of using an RO water filtration system is that it removes all the impurities from the water which result in delicious drinking water.
RO system passes the water through three carbon filters which ensure that there is no bad taste or odor present in the water and user can observe an obvious difference in the water taste once they drink the RO supplied water.
Better for Cooking Food
Another great benefit of using the RO water filtration system is that it allows you to use pure clean water for cooking which can also improve the taste of your cooked food.
If you use chlorinated water for cooking then you would notice a weird odor and taste and will also notice discoloration of the food.
How to Install an RO Filter
So, now that you understand the RO system and various benefits of using it, you finally can learn how to install it yourself. Installing an RO water filtration system is easy if you read carefully all the steps and follow them in the correct order.
Step 1: Purchase the Right Sized RO System
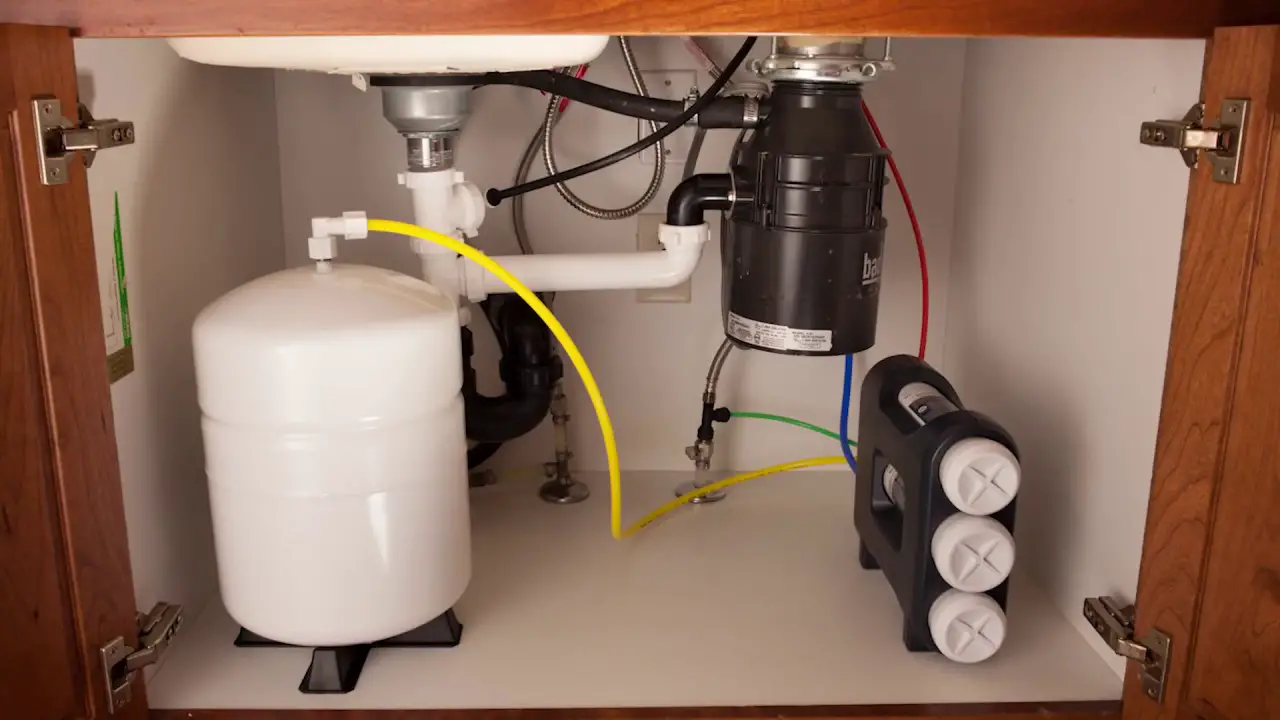
The first step is to purchase an RO system which will easily fit in your kitchen. For this, you need to first check the available space beneath your kitchen sink for the RO tank and filtration system.
Once you know the water source and storage place, you can select an appropriate RO water filtration system which will easily fit in that space.
Step 2: Check the Installation Space
Once you have purchased the RO system, you need to check again if it will fit under your sink or not. So, unbox your components and the just place it together to check how it is to be connected.
A few RO systems can also be installed in a remote location like a garage and can help you in saving a lot of storage space although it requires a lot of effort too.
Step 3: Install the RO System’s Faucet
Once you have all the equipment and place ready, you need to start by installing the faucet. So, mount your RO faucet housing to the sink and then insert the water line and lock the faucet onto the housing once the air gap is connected to the faucet.
Step 4: Install the Tank Connector
Now, you need to install the RO tank. For this, you need to first install the tank connector and then place your tank beneath the sink.
Apply a little plumber’s tape to the threads and then connect the connector to the tank with the help of screws. Make sure you tighten the connector with your hand only and then put your tank in its place.
Step 5: Remove the Filter Assembly
Now, you need to disassemble the filter assembly cover and then mark a straight leveled locations on the wall where the hanger washers will be hung. Make sure that it is at least 15 ½-inches above the floor so that you have enough space to remove the water filters.
Then, screw the hanger washers on the marked places and then place the assembly on these washers.
Step 6: Connect the Water Supply Line
You will find a green line of ¼-inches which needs to be connected to the water supply line but make sure you shut off the water valve before you do that.
Step 7: Connect the Tubing
Then, you need to connect the tubing and make sure you place it at the back of the cabinets for a clean and untangled installation. You can also leave a little extra tubing so that you can move your RO system around easily and you can also trim it if you don’t want the extra part hanging around in the kitchen.
You will find two tubing, one needs to be connected to the storage tank and the other one needs to be pushed into the RO assembly, while the third tubing will be pushed into the drain adapter kit. Make sure that you follow the manufacturer’s instruction about connecting the correct colored tubing to the correct location.
Step 8: Fit the Drain
In many RO systems, you will also have a drain tee which will need to be set up to the existing pipe which will need to be marked and cut.
Ensure that you make perfect cuts so that the tee fits perfectly and then tighten the nuts and washers with your hand. Use the nuts and the washers to screw the drain end and then push the drain tubing inside the drain adapter tee.
Step 9: Test the Water Pressure
Now, you need to check your RO system and verify if it has been installed correctly and tightly. For this, you need to turn the water supply on and then turn your cold water knob. It will take time for the pressure to build and around 2 hours to get full pressure. Make sure that all the fittings tight and not loose or leaking.
Make sure that you drain the first batch of water completely by turning on the RO system’s faucet on and continue this for an entire day. You might notice that water fills your RO tank slowly once it gets completely empty so give it another 24 hours and then start using your RO system for clean drinking water.
How to install an Under sink RO system by US Water Systems